Getting Started with ROS2: A Hands-on Guide for Beginners
In this guide, instead of passively reading, you’ll get hands-on experience with ROS2 (Robot Operating System 2). Whether you’re a robotics enthusiast or just curious about how robots are programmed, this tutorial is designed to make learning both fun and practical.
We’ll cover the following steps:
- Introduction to ROS2 and what makes it essential for robotic development.
- Installing ROS2 LTS versions on Ubuntu 22.04 and 24.04.
- Exploring the ROS2 ecosystem to understand its core components.
- Interacting with the TurtleSim program, your first virtual robot in ROS2.
By the end of this tutorial, you’ll have installed ROS2, gained a working knowledge of its tools, and played with your first robotic program. Now, let’s jump in!
What is ROS2?
A New Era for Robotic Programming
ROS2 is the second generation of the popular Robot Operating System (ROS), a framework that enables software developers to build modular robotics applications. The first version of ROS revolutionized how robots were developed by promoting code reuse, modular design, and inter-operability between different robotics tools and sensors. However, ROS1 had certain limitations, especially around real-time performance, security, and multi-platform support.
That’s where ROS2 comes in. ROS2 addresses these issues by:
- Supporting real-time systems, crucial for robotic applications.
- Providing native support for multiple platforms (including Windows and Mac).
- Enabling security features like encrypted communication between components.
- Improving scalability for more complex systems like swarms of drones or fleets of autonomous vehicles.
ROS2 is increasingly becoming the go-to framework for building next-gen robotics solutions in industries like autonomous vehicles, warehouse automation, and robotic arms for manufacturing.
Installing ROS2 LTS Versions (Ubuntu 22.04 and 24.04)
Let’s get your system ready with ROS2. While ROS2 is optimized for Ubuntu, it also offers full support for Windows and Mac, making it accessible across platforms. This guide will focus on Ubuntu, with detailed instructions for installing ROS2 on Ubuntu 22.04 (Humble Hawksbill) and Ubuntu 24.04 (Jazzy Jalisco). Both are LTS (Long-Term Support) releases, providing stability and compatibility over the long run. Humble will be supported until 2027, while Jazzy extends support through 2029.
Step 1: Preparing Your System
Before installing ROS2, ensure your system is up to date. Use the following command in the terminal:
sudo apt update && sudo apt upgrade -y
Make sure you have UTF-8 locale.
sudo apt install locales
sudo locale-gen en_US en_US.UTF-8
sudo update-locale LC_ALL=en_US.UTF-8 LANG=en_US.UTF-8
export LANG=en_US.UTF-8
Also, make sure the universe repository is enabled:
sudo apt install software-properties-common
sudo add-apt-repository universe
Add the ROS2 repository and GPG keys:
sudo apt update && sudo apt install curl -y
sudo curl -sSL https://raw.githubusercontent.com/ros/rosdistro/master/ros.key -o /usr/share/keyrings/ros-archive-keyring.gpg

echo "deb [arch=$(dpkg --print-architecture) signed-by=/usr/share/keyrings/ros-archive-keyring.gpg] http://packages.ros.org/ros2/ubuntu $(. /etc/os-release && echo $UBUNTU_CODENAME) main" | sudo tee /etc/apt/sources.list.d/ros2.list > /dev/null

sudo apt update && sudo apt upgrade
Step 2: Installing ROS2
Humble in Ubuntu 22.04
For Ubuntu 22.04, we’ll install the Humble Hawksbill version, the LTS release supported until May 2027.
sudo apt install ros-humble-desktop
Source the environment:
Add this to your .bashrc so ROS2 commands are available in every terminal:
echo "source /opt/ros/humble/setup.bash" >> ~/.bashrc
source ~/.bashrc
Jazzy in Ubuntu 22.04
For Ubuntu 24.04, we’ll install the Jazzy Jalisco version, which provides the latest improvements and long-term support until May 2029.
sudo apt install ros-jazzy-desktop
Source the environment:
Add this to your .bashrc so ROS2 commands are available in every terminal:
echo "source /opt/ros/jazzy/setup.bash" >> ~/.bashrc
source ~/.bashrc
Install dev tools
sudo apt update && sudo apt install ros-dev-tools
Step 3: Verifying the Installation
Once the installation is complete, it’s important to confirm that ROS2 is correctly set up and accessible. Open a new terminal and type:
ros2
If everything is working as expected, you should see a help message displaying available ROS2 commands and options. This confirms that ROS2 is correctly installed and the environment variables have been sourced.
Step 4: Try a Simple Example
To make sure ROS2 is working properly, let’s try out a basic communication example using two simple programs:
- Talker: A node that publishes messages continuously.
- Listener: A node that subscribes to those messages and prints them in the terminal.
These programs are part of the demo_nodes_py package, which is included with your ROS2 installation. Follow these steps to test them.
Start the Talker Program
Open a terminal and run the following command:
ros2 run demo_nodes_py talker
This command launches the talker node, which will begin publishing a stream of messages to a topic. You’ll see output similar to the following:
[INFO] [talker]: Publishing: 'Hello World: 1'
[INFO] [talker]: Publishing: 'Hello World: 2'
[INFO] [talker]: Publishing: 'Hello World: 3'
The talker is broadcasting a new message every second. Each message contains the string "Hello World" followed by an incrementing number.
Start the Listener Program
Now, open a second terminal window (leave the talker program running in the first one) and type:
ros2 run demo_nodes_py listener
This command starts the listener node, which subscribes to the messages from the talker. You’ll see output in this terminal like:
[INFO] [listener]: I heard: 'Hello World: 1'
[INFO] [listener]: I heard: 'Hello World: 2'
[INFO] [listener]: I heard: 'Hello World: 3'
The listener prints every message it receives from the talker in real-time, demonstrating the publisher-subscriber communication model in ROS2.
How It Works
- The talker node publishes data to a topic named
/chatter. - The listener node subscribes to the same topic and prints the messages it receives.
- This simple example showcases how ROS2 allows nodes to communicate asynchronously using topics.
Stopping the Programs
To stop the nodes, press Ctrl + C in each terminal. This will terminate both the talker and listener programs.
Troubleshooting Installation Issues
If you run into any issues, ensure that your package sources are up to date:
sudo apt update --fix-missing
You can also check the ROS2 documentation for additional help:
https://docs.ros.org
Exploring the ROS2 Ecosystem
Now that ROS2 is installed, let’s explore the key components that make up the ROS2 framework. Understanding these concepts will help you as you build your own robotics projects.
Nodes:
A node is a single process in ROS2 that performs a specific task, like reading sensor data or controlling motors. Multiple nodes can run simultaneously, each handling different aspects of a robot’s operation.Topics:
Topics allow nodes to communicate by publishing and subscribing to messages. For instance, a camera node might publish video frames to a/cameratopic, and other nodes can subscribe to process the data.Messages:
Messages are the data structures transmitted over topics. A message might contain the robot’s position, sensor readings, or even a velocity command.Services:
Services allow one node to send a request to another and receive a response. Unlike topics, which provide continuous data streams, services work synchronously.Actions:
Actions are used for tasks that take a longer time to complete, like navigating to a location. They provide feedback during the task, such as reporting the robot’s current position.Launch Files:
Launch files make it easy to start multiple nodes at once. This is particularly useful for running complex robotic applications with many components.

In the talker-listener example we saw in the above section, there are two nodes:
- Node 1 (Talker) publishes messages on the ‘chatter’ topic.
- Node 2 (Listener) subscribes to the ‘chatter’ topic and handles incoming messages.
This is a basic representation of the publisher-subscriber pattern, where nodes communicate with each other by sending and receiving messages over a common channel.
We will explore services, actions and launch files in a later post.
Playing with the TurtleSim Program
Now that you know the basics, let’s have some fun by interacting with a virtual robot using the TurtleSim program.
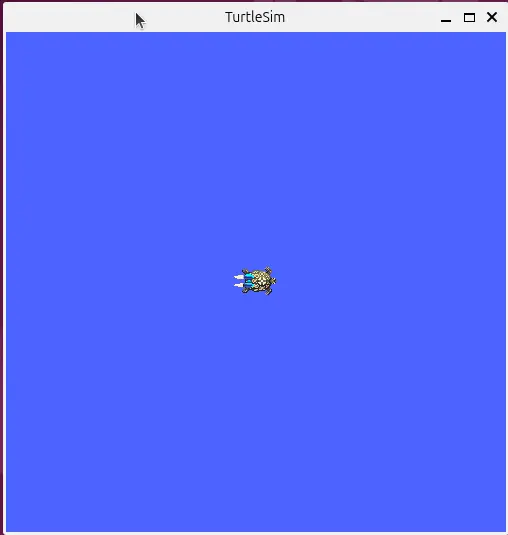
Step 1: Launch TurtleSim
Open a terminal and launch the TurtleSim node:
ros2 run turtlesim turtlesim_node
You’ll see a new window with a cartoon turtle at the center of the screen. This is your virtual robot!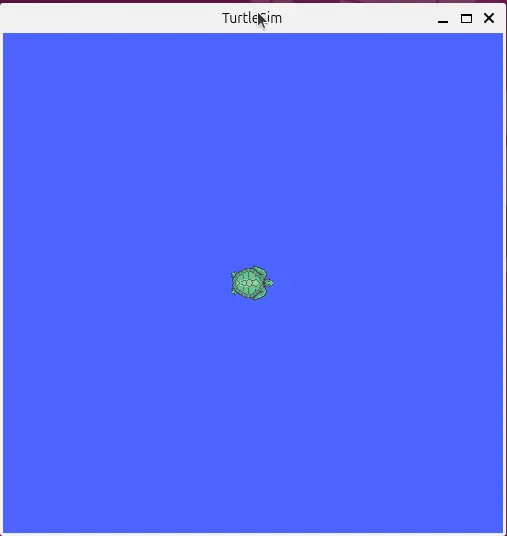
Step 2: Move the Turtle
In another terminal, publish a command to move the turtle:
ros2 topic pub /turtle1/cmd_vel geometry_msgs/msg/Twist "{linear: {x: 2.0}, angular: {z: 0.0}}"
This command makes the turtle move forward. Experiment by changing the speed values to see how the turtle behaves.
Step 3: Rotate the Turtle
Try rotating the turtle by modifying the angular velocity:
ros2 topic pub /turtle1/cmd_vel geometry_msgs/msg/Twist "{linear: {x: 0.0}, angular: {z: 2.0}}"
Step 4: Reset the Turtle’s Position
If you want to reset the turtle back to its starting position, use this command:
ros2 service call /reset std_srvs/srv/Empty
This should clear the screen and place a new turtle in the center of the screen.
Step 5: Control the Turtle with the Keyboard
Launch the keyboard teleoperation node:
ros2 run turtlesim turtle_teleop_key
Now, use the arrow keys to move the turtle interactively.
We intentionally left out many behind-the-scenes details about how the TurtleSim demo works to keep things simple for this introduction. Don’t worry—we’ll dive deeper into those concepts in a future discussion. For now, enjoy experimenting with TurtleSim and take pride in having successfully set up ROS2 and getting this far. Great job on taking your first step into the world of robotics!
Conclusion
You’ve now completed your first hands-on experience with ROS2! Here’s what we covered in this post:
- Installed ROS2 LTS versions on Ubuntu 22.04 and 24.04.
- Learned the essential components of the ROS2 ecosystem.
- Controlled a virtual turtle using TurtleSim.
With this foundation, you’re ready to explore more advanced topics such as creating custom nodes, simulating robots in Gazebo, or even building your own autonomous robot! Keep experimenting and learning—this is just the beginning of your robotics journey.
Use the share button below if you liked it.
It makes me smile, when I see it.